One of the happiest days of my life was when I found out I could get Microsoft Visual Studio Express editions for free. I enjoy programming in the Visual Basic environment more than any other programming language I have experienced. However, Visual Basic is not cut out to do some of the things that require more horsepower. That’s where C++ comes in. C++ offers the speed and power Visual Basic lacks.
I have tried several times to incorporate a DLL written in C++ in my Visual Basic programs but always had trouble using the functions in the DLL. After working with it for a while it always turned out that my problems were caused by the fact that the names of the functions in the DLL were altered or mangled. Since I always have the same problem each time, I thought I would write down the steps I need to take to prevent the problem in the future.
One easy solution is to find the mangled name of the function and use it when you declare the function in your Visual Basic module or class. The program dumpbin.exe can be used to find the names of the exported functions in the DLL. Use the command line dumpbin.exe /exports my_dll_name.dll and you end up with a list of all the exported symbols in the DLL. Dumpbin.exe is in the vc\bin folder where the Visual Studio programs are installed. It also needs a DLL, mspdb80.dll in my case, which it will complain about if it can’t find it. Mspdb80.dll is located in the common7/ide folder of the Visual Studio installation folder. For more information read Identifying Functions in DLLs and DUMPBIN Reference
The best way is to get Visual C++ to export the names the way you wrote them in the first place. I have written down the steps to create a Visual C++ DLL and use it in a Visual Basic program. The steps and code worked in both Visual Studio 2005 and Visual Studio 2008. I found most of this information here: Visual C++ DLL How to build a DLL to be used from another programming language - CodeGuru Forums
Note: If you are compiling in Visual Basic while on a 64 bit operating system, you will probably have to create a x86 solution for your project in the Configuration Manager because you can't call a 32 bit DLL from a 64 bit project you get when you build for "Any CPU".
Step 1:
Start a new project in Visual C++.
Start A New Project: 
Step 2:
Choose "Win32" from "Project types".
Choose "Win32" Project from "Templates".
Give the project a name.
Click "OK".
New Project Dialog: 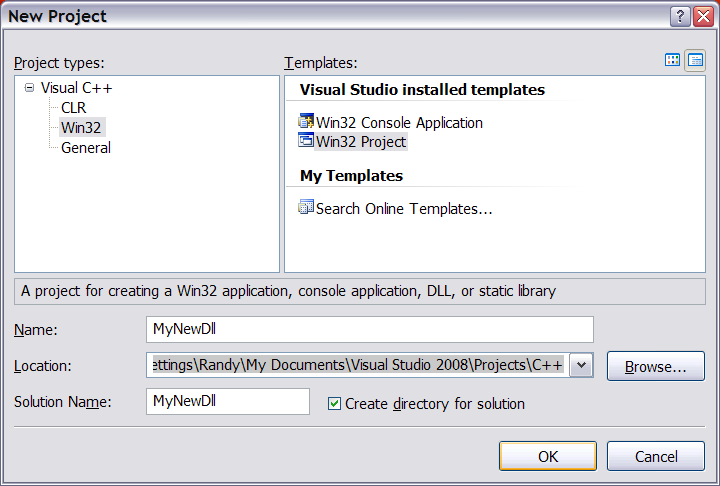
Step 3:
Select "DLL" under "Application type".
Check the box for "Export Symbols" under "Additional options".
Click "Finish".
Application Wizard Dialog: 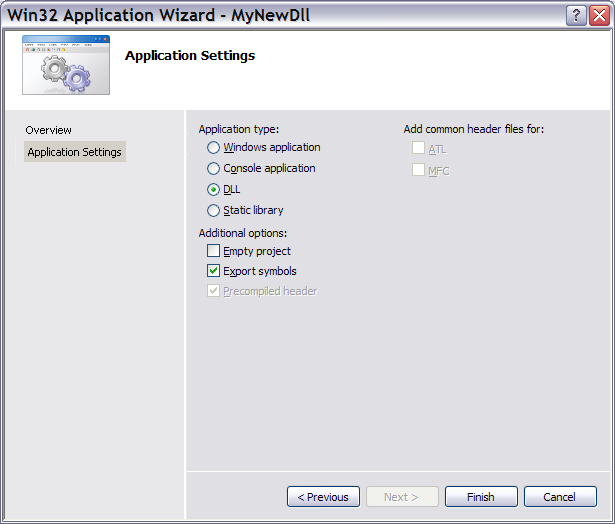
Step 4:
Declare the functions as extern “C” using the __stdcall calling convention. The functions must also be declared with the __declspec(dllexport) specification to export them. This is done through the macros created by Visual C++ when you select Export Symbols in the Application Wizard Dialog. In this case MYNEWDLL_API is defined as __declspec(dllexport) when compiling MyNewDll.dll. The symbol MYNEWDLL_API is unique to this project and will differ depending on the name of your project.
MyNewDll.h:
// The following ifdef block is the standard way of creating macros which make exporting
// from a DLL simpler. All files within this DLL are compiled with the MYNEWDLL_EXPORTS
// symbol defined on the command line. this symbol should not be defined on any project
// that uses this DLL. This way any other project whose source files include this file see
// MYNEWDLL_API functions as being imported from a DLL, whereas this DLL sees symbols
// defined with this macro as being exported.
#ifdef MYNEWDLL_EXPORTS
#define MYNEWDLL_API __declspec(dllexport)
#else
#define MYNEWDLL_API __declspec(dllimport)
#endif

// This is the function to be exported from the MyNewDll.dll
extern "C" MYNEWDLL_API int __stdcall MyNewFunction(void);
MyNewDll.cpp:
// MyNewDll.cpp : Defines the exported functions for the DLL application.
//

#include "stdafx.h"
#include "MyNewDll.h"

// This is the function to be exported from the MyNewDll.dll
extern "C" MYNEWDLL_API int __stdcall MyNewFunction(void)
{
	return 42;
}
Step 5:
Create a new module-definition file and save it with a .def file extension.
Create New File: 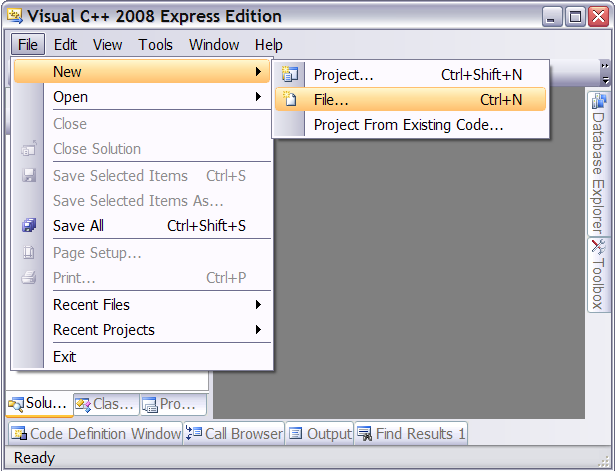
Select Text File: 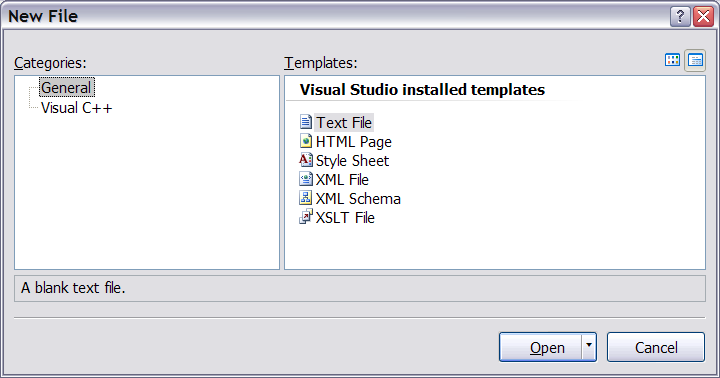
MyNewDll.def:
LIBRARY MyNewDll

EXPORTS
MyNewFunction @1
Step 6:
Set the "Module Definition File" property in the Linker Input section of the Project properties dialog to point to the module-definition file you created.
Open Project Properties Dialog: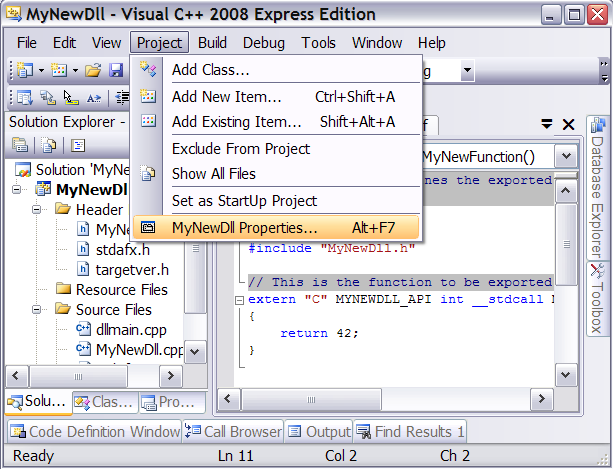
Project Properties Dialog: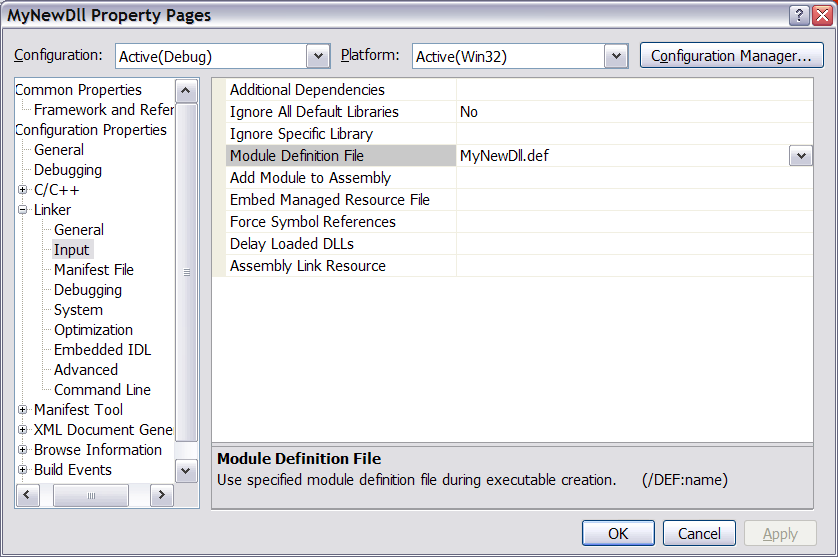
Step 7:
Build the DLL
Build Solution: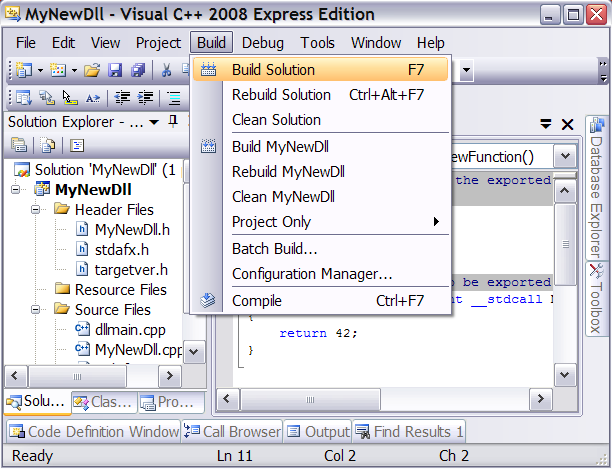
Step 8:
Add your new dll to your Visual Basic project by adding an existing item to the project. This will copy the dll to your project directory. If you change the dll you will have to copy it again. Set the "Copy to Output Directory" property of the dll to "Copy always" or "Copy if newer".
Add Existing Item:
Step 9:
Declare the function in the module or class where it will be used.
Declare Function:
Public Declare Auto Function MyNewFunction _
        Lib "MyNewDll.dll" Alias "MyNewFunction" () As Integer
Step 10:
Use the function in your code.
Use the Function:
Private Sub Button1_Click(ByVal sender As System.Object, ByVal e As System.EventArgs) Handles Button1.Click
    Label1.Text = MyNewFunction().ToString
End Sub